Moving in the rain: tips and tricks
Moving in the rain can be stressful, especially in areas like South Florida, where the weather is unpredictable. While we can't control the weather, ...
License Number: US DOT 2855891
MR 01221
IM 2721
MC 956262
Knowing how to pack home audio equipment correctly can save you from costly repairs and frustrating reassembly. Audio systems include fragile parts, like speaker cones, tonearms, and input ports, that can easily break during a move. Loose cables and unlabeled wires only add to the confusion when it’s time to set up again. In this Pro Movers Miami guide, you’ll find clear, step-by-step instructions for packing each type of home audio device so everything arrives intact and ready to use, whether you’re moving locally or across the country.
Audio gear has different parts that need special care. Before you start wrapping and boxing, take a few minutes to get ready. Doing this now will help you avoid costly mistakes later.
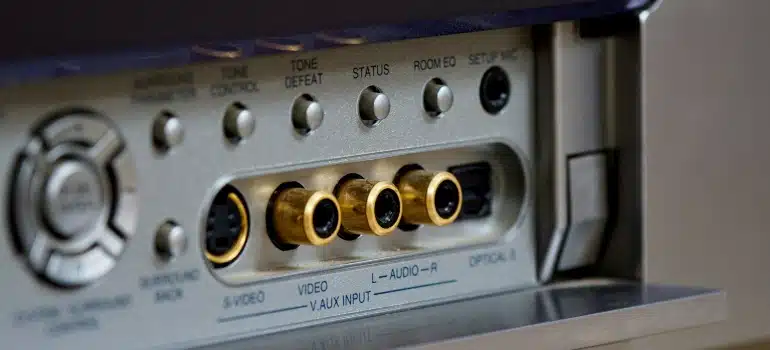
Before unplugging anything, take clear photos of the back of each device. Such images will help you reconnect everything correctly later. That step is especially useful for receivers or surround systems with multiple speakers and media inputs. Without visual references, reassembly can turn into a frustrating puzzle.
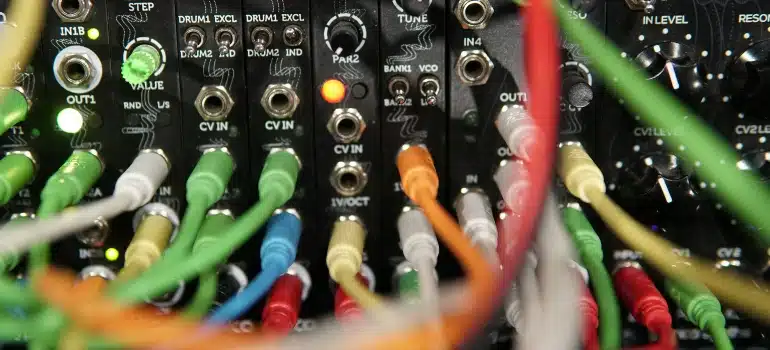
After photographing, label every cable using painter’s tape or removable tags. Write what device and port each one connects to, like “TV HDMI 2” or “left front speaker.” It prevents mix-ups that could damage audio ports or lead to poor performance when setting up again.
Take out all CDs, DVDs, USB drives, and batteries. These items can shift or leak during transport. Battery leakage, in particular, can destroy internal wiring or corrode contact points. Keep removable items in a small container or zip-lock bag, clearly labeled for each device.
Use a dry microfiber cloth to wipe down each unit. Dust on surfaces can cause scratches, and particles near vents can get pulled into fans or speakers. Clean gear also packs better, fewer particles mean fewer risks of abrasion between wrapped components.
Each part of your sound system needs specific packing steps. Don’t use a one-size-fits-all method. Instead, either book white glove packing services or pack based on the shape, weight, and fragility of the item.
Speakers vary in size and build. Bookshelf speakers, subwoofers, and floorstanding units each require different treatment:
Avoid placing anything on top of packed speakers. Their cones can get crushed, and their cabinets can crack.
Receivers, amplifiers, and equalizers can be heavy and fragile. Always double-box these devices if you can. Here’s how to pack home audio equipment properly:
Miami’s humid climate and busy roads increase the risk of damage during moves. This method protects against bumps and sudden pressure changes, making professional packing services in Miami essential for safeguarding your equipment.
Turntables have tonearms and platters that need to stay still during transport. Remove them if possible. This is how you prepare them:
Packing turntables correctly keeps your needle and belt in good shape for future use.
Even if you pack everything well, poor placement in the moving truck can still cause harm. You need to think about how and where to place the boxes.
Place heavier items like subwoofers and receivers low and toward the back of the truck. Use blankets or pillows to fill gaps and prevent shifting. Avoid stacking boxes of audio gear unless necessary. If you must, make sure lighter boxes go on top. Never stack on turntables or speakers.
Sometimes you won’t unpack everything right away. Maybe your new place isn’t ready. Maybe you’re downsizing. Dust, moisture, and temperature swings can cause lasting damage if storage isn’t handled carefully. That’s why every detail, how you pack, where you store, and how items are placed, matters.
Electronics don’t handle heat, humidity, or extreme cold well. If you plan to pack home audio equipment for storage, keep in mind that a non-climate-controlled unit can cause serious issues like:
In Miami, high humidity and heat can damage audio gear over time. A climate-controlled unit maintains a stable temperature, typically between 55°F and 80°F, and controls humidity to stay below 60%. It prevents swelling, shrinking, or shorting out. If your system includes tube amplifiers, vinyl components, or older receivers, climate-controlled Miami storage facilities are not optional but essential.
Even climate-controlled units can have leaks or condensation. Keeping boxes directly on the floor risks:
Use wooden pallets, plastic risers, or industrial shelves. These create airflow underneath and protect boxes from ground moisture. Stack heavier gear at the bottom and leave 1–2 inches of space between items and walls to promote air circulation.
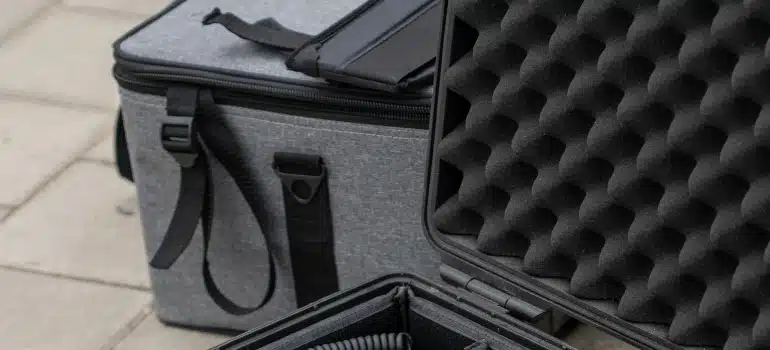
Dust and grime build up fast, especially on gear with vents or fans. Avoid letting dirt get inside the speaker grills or electronics. Use the following materials to protect your audio equipment:
Never wrap items directly with bubble wrap for long-term storage, as it can trap humidity and lead to mold or mildew.
Taking the time to prep each item and pack home audio equipment properly will save you money and hassle. So, whether you’re learning how to pack speakers for moving, how to pack stereo equipment for moving, or just want tips on protecting audio gear during relocation, following the right steps will keep your system working well.
The goal is to stay organized, avoid shortcuts, and label every box. With the right planning, you’ll enjoy your favorite sound system again soon after moving day!
Packing audio gear comes with questions, especially when dealing with expensive or delicate components. Below are answers to common questions about how to pack, move, and protect your sound system.
A: Disconnect all cables and label them. Wrap each item in anti-static bubble wrap. Use boxes with padding on all sides. Place heavy items like amplifiers low in the moving truck. Keep speakers upright and never stack items on top. Fill empty gaps with blankets or soft materials to reduce shifting during transit.
A: Use anti-static bubble wrap and packing paper for sensitive areas. Place the stereo unit in a box with foam inserts or packing peanuts. For added protection, use a second box to double-wrap the item. Clearly label the box as “fragile audio equipment” and mark the upright position.
A: Choose a shipping box slightly larger than the item. Wrap the stereo in anti-static material and use custom foam inserts if possible. Seal the box with strong tape and mark it as fragile. Use a reputable courier that offers insurance and tracking. Avoid shipping during extreme weather unless you use climate-controlled services.
A: Remove the soundbar from its mount or stand. Wrap it in bubble wrap, avoiding the speaker mesh area. Place it in a box that allows two inches of padding on all sides. Fill the remaining space with foam or paper. Label the box and keep the soundbar horizontal during transport.
A: Not all movers are trained for specialty items. If you’re relocating both high-end speakers and a piano, it’s smart to work with teams that handle both. Trusted piano movers in Miami often offer custom padding, floor protection, and equipment that makes transporting large instruments safe and efficient.
A: Yes, the original box is often the best option. It’s usually molded to fit the exact shape of your gear. Add extra padding if the box has worn out or if you no longer have all the original inserts.
A: Yes, bundle cables with zip ties or Velcro straps. Place them in labeled zip-lock bags. Store accessories like remotes, mounts, and power cords in a dedicated box labeled by component. This makes the setup faster and avoids losing small parts.